Extreme 스위치 iparp timeout 조정

익스트림 스위치의 iparp timeout 값 조정하기.

익스트림 스위치의 iparp 결과를 보면, iparp timeout 기본값이 20분으로 설정된 것을 볼 수 있다.

Switch.1 # show iparp
VR-Default    172.30.232.10    00:04:96:98:85:93    3      NO  V120          120   13
...
Timeout          :          20 minutes     ARP Sender-Mac Learning   :   Disabled
...

이 시간을 조정해야 할 필요가 생길 경우에, 아래와 같은 명령어로 조정이 가능하다.

Switch.2 # configure iparp timeout 5

이제 아래와같이 timeout 값이 5분으로 변경된 것을 확인 할 수 있다.

* Switch.3 # show iparp
...
Timeout          :           5 minutes     ARP Sender-Mac Learning   :   Disabled

...

기본값으로 다시 변경하기를 원하면 설정을 삭제하면된다.

* Switch.4 # unconfigure iparp

* Switch.5 # show iparp

...
RP address check:    Enabled              ARP refresh               :    Enabled
Timeout          :          20 minutes     ARP Sender-Mac Learning   :   Disabled
Locktime         :        1000 milliseconds
...

[django recipe] django admin 페이지 변경하기.

django 버전: 2.0 이상

1. 로그인 페이지 변경.

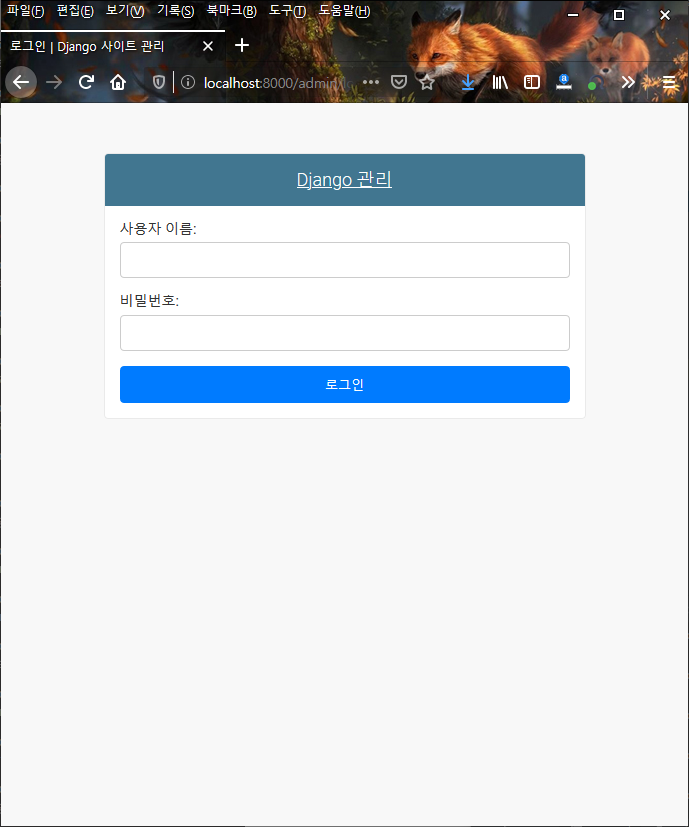
django admin 페이지에 로그인 하려고 하면 아래처럼 ‘Django 관리’ 라는 이름으로 로그인 화면을 보여준다.

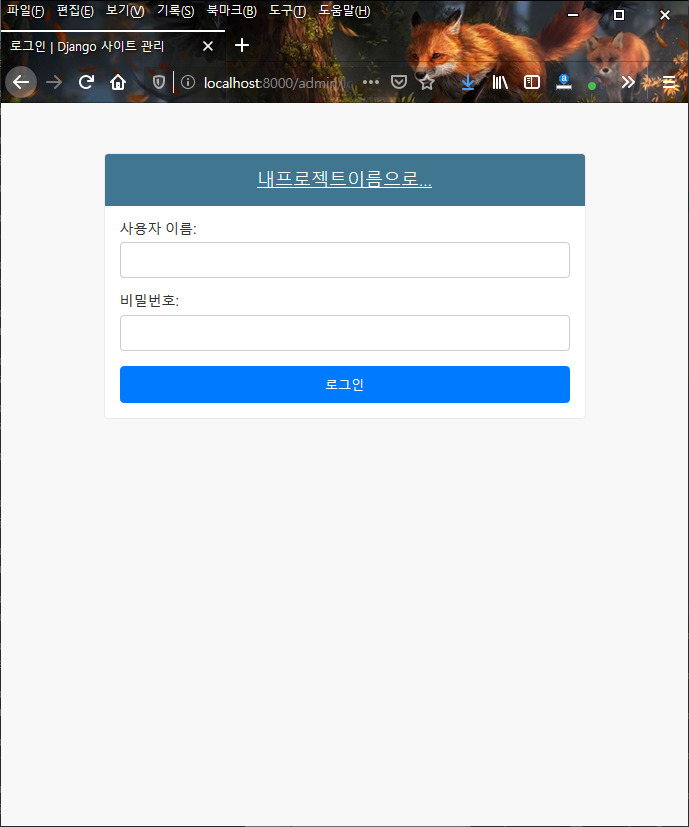
이것을 원하는 이름으로 변경하려면, project/urls.py 에 admin.site.site_header 를 설정하여 변경 할 수 있다.

...

admin.site.site_header = '내프로젝트이름으로...'

위 내용을 추가하고 로그인 페이지를 보면,

Continue reading

Ubuntu 리눅스에 Django 어플리케이션 배포하기(Nginx+Django+uWSGI)

Ubuntu 리눅스에 Django 어플리케이션 배포하기(Nginx+Django+uWSGI)

* 작업환경
OS: ubuntu 20.04 LTS
Python: Python 3.8.2
uwsgi : 2.0.18
Django: 3.0.6
Nginx : 1.17.10

1. 준비작업(Django project 만들고 django app 만들기 – 배포 테스트용)

virtualenv 로 간단한 프로젝트를 만든다. virtualenv 가 없으면, 아래 명령어로 설치한다.

$ sudo apt install python3-virtualenv

python 가상환경을 만들고 django를 설치한다.

snowfox@ubuntu:~$ virtualenv DjangoTest
snowfox@ubuntu:~$ . DjangoTest/bin/activate
(DjangoTest) snowfox@ubuntu:~$
(DjangoTest) snowfox@ubuntu:~$ pip install django

이제, Test라는 이름의 django project를 만든다.

(DjangoTest) snowfox@ubuntu:~$ cd DjangoTest
(DjangoTest) snowfox@ubuntu:~/DjangoTest$ ls
bin  lib  pyvenv.cfg
(DjangoTest) snowfox@ubuntu:~/DjangoTest$ django-admin startproject Test
(DjangoTest) snowfox@ubuntu:~/DjangoTest$ ls
Test  bin  lib  pyvenv.cfg

Test 프로젝트에서 testapp을 만든다.

(DjangoTest) snowfox@ubuntu:~/DjangoTest$ cd Test
(DjangoTest) snowfox@ubuntu:~/DjangoTest/Test$ python manage.py startapp testapp
(DjangoTest) snowfox@ubuntu:~/DjangoTest/Test$ ls
Test  manage.py  testapp

Continue reading

Ubuntu 일반 사용자에게 sudo 권한주기.

일반 사용자에게 sudo 권한 주기

작업환경: ubuntu 20.04 LTS

* 일반 사용자 계정 등록

# useradd -d /home/testuser -m -s /bin/bash -c "test" testuser
root@ubuntu:/etc# passwd testuser
New password:
Retype new password:
passwd: password updated successfully

일반 사용자인 testuser로 로그인 후에 sudo 명령을 내리면 아래처럼 sudoers 파일에 등록되지 않았다는 메시지가 나온다.

testuser@ubuntu:~$ sudo -s
[sudo] password for testuser:
testuser is not in the sudoers file.  This incident will be reported.
testuser@ubuntu:~$

Continue reading

vmware tools 옛날버전 다운로드

vmware tools (vmware client) 옛날 버전은 아래 링크에서 다운로드 받을 수 있다.

https://packages.vmware.com/tools/esx/

리눅스 timedatectl

리눅스에서 날짜/시간을 조정하는 방법에는 여러 가지가 있다.

완전 수동 방식: date 명령어로 날짜 시간을 조정하였음.
옛날(?) 방식: ntpdate, rdate 로 time 서버와 시간 동기화.
최신(?) 방식: timedatectl

1. Ubuntu 18.04 에서 timedatectl 사용하기.

전통적인 명령어인 date 명령어로 현재 날짜/시간을 확인 할 수 있다.

$ date
Tue Apr 21 10:57:03 KST 2020

하지만, timedatectl 명령으로는 현재 날짜, 시간, 타임존, 타임서버와의 동기화 여부를 모두 확인 가능하다.

$ timedatectl
                      Local time: Tue 2020-04-21 10:57:07 KST
                  Universal time: Tue 2020-04-21 01:57:07 UTC
                        RTC time: n/a
                       Time zone: Asia/Seoul (KST, +0900)
       System clock synchronized: yes
systemd-timesyncd.service active: yes
                 RTC in local TZ: no

Continue reading

Ubuntu 18.04, nvidia cuda 설치하기.

Ubuntu 18.04, nvidia cuda 설치

1. GPU 설치 확인
Tesla V100이 설치되어 있으며, device driver가 설치되어 있지 않아서 UNCLAIMED로 표시된다.

$ sudo lshw -c display
  *-display:1 UNCLAIMED
       description: 3D controller
       product: GV100GL [Tesla V100 SXM2 32GB]
       vendor: NVIDIA Corporation
       physical id: 9
       bus info: pci@0000:00:09.0
       version: a1
       width: 64 bits
       clock: 33MHz
       capabilities: pm msi pciexpress cap_list
       configuration: latency=0
       resources: iomemory:80-7f iomemory:100-ff memory:fc000000-fcffffff memory:800000000-fffffffff memory:1000000000-1001ffffff

Continue reading

KVM guest에 nvidia GPU 할당할때 오류 처리

KVM guest에 nvidia GPU (path through)할당할때 오류 처리.

Host OS: CentOS 7, 4 nvidia GPU
Guest OS: Ubuntu 18.04

kvm guest에 Nvidia GPU를 할당하고 실행했을때, 아래 오류가 발생했다.
Nvidia GPU는 아래 그림처럼 PCI 디바이스에서 찾아 볼 수 있다.

오류 내용은 아래와 같다.

Error starting domain: unsupported configuration: host doesn't support passthrough of host PCI devices

Traceback (most recent call last):
  File "/usr/share/virt-manager/virtManager/asyncjob.py", line 89, in cb_wrapper
    callback(asyncjob, *args, **kwargs)
  File "/usr/share/virt-manager/virtManager/asyncjob.py", line 125, in tmpcb
    callback(*args, **kwargs)
  File "/usr/share/virt-manager/virtManager/libvirtobject.py", line 82, in newfn
    ret = fn(self, *args, **kwargs)
  File "/usr/share/virt-manager/virtManager/domain.py", line 1506, in startup
    self._backend.create()
  File "/usr/lib64/python2.7/site-packages/libvirt.py", line 1080, in create
    if ret == -1: raise libvirtError ('virDomainCreate() failed', dom=self)
libvirtError: unsupported configuration: host doesn't support passthrough of host PCI devices

Continue reading

[Django Recipe] django-import-export 관리자페이지 적용.

django-import-export 관리자 페이지 적용하기.

django-import-export는 csv, xlsx 등의 파일을 읽어 데이타베이스에 저장하거나, 데이타베이스의 내용을 csv, xlsx등의 파일로 저장하는 기능을 제공한다.
지원되는 파일 포맷은 tablib 가 지원하는 형식이며, tablib는 Excel, JSON, YAML, HTML, Jira, TSV, ODS, CSV, DBF를 지원한다.

1. 설치

pip install django-import-export

2. 설정

project/settings.py 에 아래 내용 추가

INSTALLED_APPS = [
    ...
    'import_export',
    ...
]
manage.py collectstatic

Continue reading