
Ubuntu 20.04 (raspberry pi 4)에 nextcloud 설치하기
Raspberry Pi 4를 이용해서 사용할만한 cloud storage를 찾아보다가 IOS와 데스크탑 클라이언트가 제공되는 pydio cells 와 nextcloud를 후보(?)로 올렸다.
pydio cells는 ARM 용으로 컴파일된 패키지를 제공하지 않아서 소스코드를 다운로드 받아 컴파일했으나, 결과가 좋지 않았다.
컴파일은 잘 되었으나, mysql8을 이용한 로그인 과정에서 문제 발생했으며, mysql5.7 버전으로 변경해서 설치했으나 로그인 후 사용이 불가능할 정도로 오류가 발생해서 포기했다.
반면, nextcloud는 시험 사용중에 특별한 문제는 발생하지 않았고, 성능도 크게 떨어지지 않았다.
* 작업환경
Hardware: raspberry pi 4 4GB
OS: ubuntu server 20.04
* 사전 설치
웹서버: apache2
데이타베이스: mysql-8
PHP: 7.4
기타 : nextcloud가 요구하는 php 모듈(https://docs.nextcloud.com/server/20/admin_manual/installation/source_installation.html#prerequisites-for-manual-installation)
1. NextCloud 다운로드
apache2, php7.4, 기타 필요한 패키지는 apt로 설치하였으며, 여기서는 생략한다.
먼저 nextcloud를 설치할 디렉토리를 만들고 다운로드한다. 여기서는 /home/cloud 를 사용한다.
$ sudo -i
# mkdir /home/cloud
# cd /home/cloud
# curl -O https://download.nextcloud.com/server/releases/nextcloud-20.0.4.zip
압축을 해제한다.
# unzip nextcloud-20.0.4.zip
압축해제한 디렉토리 이름을 웹서버에서 설정할 디렉토리 이름으로 변경한다. 여기서는 public_html 로 변경한다.
# mv nextcloud public_html
웹서버가 접근가능하도록 소유권을 변경한다.
# chown -R www-data:www-data /home/cloud
2. 데이타베이스 설정.
# mysql -u root -p
Enter password:

mysql> create database ncloud;
Query OK, 1 row affected (0.03 sec)

mysql> create user 'ncloud'@'localhost' identified by 'xxxxx';
Query OK, 0 rows affected (0.04 sec)

mysql> grant all privileges on ncloud.* to 'ncloud'@'localhost';
Query OK, 0 rows affected (0.02 sec)

mysql> flush privileges;
Query OK, 0 rows affected (0.02 sec)

mysql> exit
3. apache2 웹서버 설정
/etc/apache2/sites-available 디렉토리에 virtual hos 설정파일을 만든다.
# cd /etc/apache2/sites-available/

# vi cloud.boxcorea.com.conf

<VirtualHost *:80>
        ServerAdmin webmaster@localhost
        ServerName cloud.boxcorea.com
        DocumentRoot /home/cloud/public_html/
        <Directory />
                Options FollowSymLinks
                AllowOverride None
        </Directory>
        <Directory /home/cloud/public_html/>
                Require all granted
                AllowOverride All
                Options FollowSymLinks MultiViews
                <IfModule mod_dav.c>
                        Dav off
                </IfModule>
        </Directory>

        ErrorLog /var/log/apache2/cloud.boxcorea_error.log

        # Possible values include: debug, info, notice, warn, error, crit,
        # alert, emerg.
        LogLevel warn

        CustomLog /var/log/apache2/cloud.boxcorea_access.log combined
        ServerSignature Off

</VirtualHost>
설정한 사이트를 활성화하고, 추가 모듈을 활성화 해 준다.(이미 활성화 되어 있을 수도 있다.)
# a2ensite cloud.boxcorea.com.conf
# a2enmod headers
# a2enmod env
# a2enmod dir
# a2enmod mime
웹 서버를 재 실행한다.
# systemctl restart apache2
4. 설치
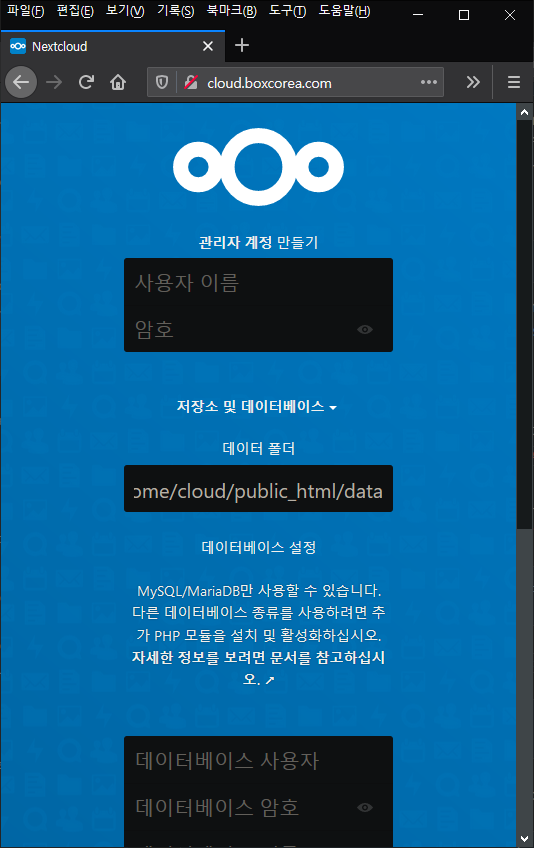
이제 웹브라우저에서 설정한 url을 입력하면 설치를 진행 할 수 있다. (그림)
명령어로 설치하려면 아래 명령어를 입력하면 된다. (xxxx 부분은 실제 비밀번호를 사용)
occ는 nextcloud 파일들이 있는 위치에 존재한다(여기서는 /home/cloud/public_html/occ
# sudo -u www-data php occ maintenance:install \
--database mysql --database-name ncloud --database-user ncloud --database-pass xxxxxxxx \
--admin-user admin --admin-pass xxxxx
설정파일에서 호스트네임을 추가해 준다. localhost 아래 부분 추가함.
# vi /home/cloud/public_html/config/config.php
...
 array (
          0 => 'localhost',
          1 => 'cloud.boxcorea.com',
  ),
...
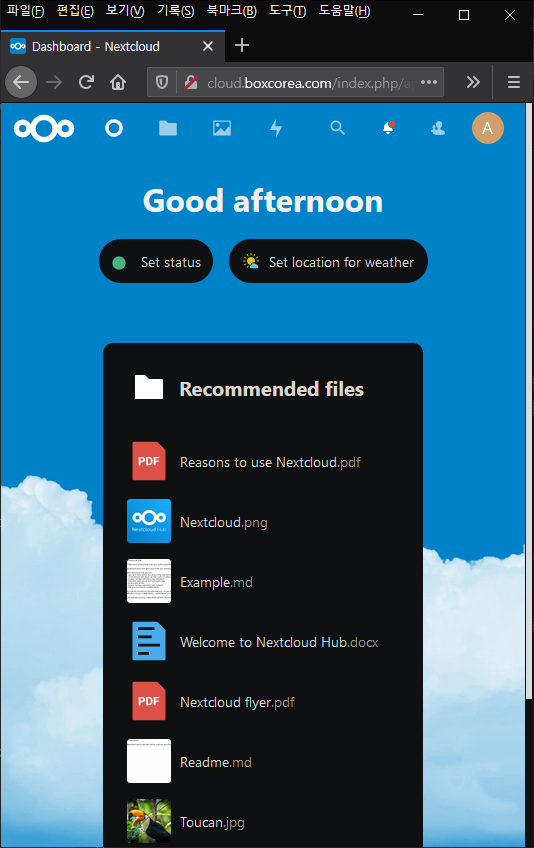
이제, 웹브라우저에서 admin 계정으로 로그인하면 사용 할 준비가 끝나며, 아래와 같은 화면을 볼 수 있다.
아래 부터는 사용에 필수사항은 아니다.
5. 깔끔한 URL 사용하기.
깔끔한 url을 사용하기 위해서는 apache 서버의 mod_env 와 mod_rewrite를 활성화 해야한다.
# a2enmod env
# a2enmod rewrite
config.php에 아래 내용을 수정하고, 추가해준다.
...
  'overwrite.cli.url' => 'http://cloud.boxcora.com/',
  'htaccess.RewriteBase' => '/',
...
아래 명령으로 설정을 적용한다.
# sudo -u www-data php occ maintenance:update:htaccess
.htaccess has been updated
6. Let’s encrypt 적용하기.
snap 명령어로 certbot을 설치한다.
# snap install --classic certbot
certbot 1.11.0 from Certbot Project (certbot-eff✓) installed
설치후, certbot 명령어를 아래처럼 링크걸어둔다.
# ln -s /snap/bin/certbot /usr/bin/certbot
인증서를 설치한다.
# certbot --apache
Saving debug log to /var/log/letsencrypt/letsencrypt.log
Plugins selected: Authenticator apache, Installer apache
Enter email address (used for urgent renewal and security notices)
 (Enter 'c' to cancel): test@test.com

- - - - - - - - - - - - - - - - - - - - - - - - - - - - - - - - - - - - - - - -
Please read the Terms of Service at
https://letsencrypt.org/documents/LE-SA-v1.2-November-15-2017.pdf. You must
agree in order to register with the ACME server. Do you agree?
- - - - - - - - - - - - - - - - - - - - - - - - - - - - - - - - - - - - - - - -
(Y)es/(N)o: y

- - - - - - - - - - - - - - - - - - - - - - - - - - - - - - - - - - - - - - - -
Would you be willing, once your first certificate is successfully issued, to
share your email address with the Electronic Frontier Foundation, a founding
partner of the Let's Encrypt project and the non-profit organization that
develops Certbot? We'd like to send you email about our work encrypting the web,
EFF news, campaigns, and ways to support digital freedom.
- - - - - - - - - - - - - - - - - - - - - - - - - - - - - - - - - - - - - - - -
(Y)es/(N)o: n
Account registered.

Which names would you like to activate HTTPS for?
- - - - - - - - - - - - - - - - - - - - - - - - - - - - - - - - - - - - - - - -
1: cloud.boxcorea.com
2: test.boxcorea.com
- - - - - - - - - - - - - - - - - - - - - - - - - - - - - - - - - - - - - - - -
Select the appropriate numbers separated by commas and/or spaces, or leave input
blank to select all options shown (Enter 'c' to cancel): 1
Requesting a certificate for cloud.boxcorea.com
Performing the following challenges:
http-01 challenge for cloud.boxcorea.com
Waiting for verification...
Cleaning up challenges
Deploying Certificate to VirtualHost /etc/apache2/sites-enabled/cloud.boxcorea.com.conf
Redirecting vhost in /etc/apache2/sites-enabled/cloud.boxcorea.com.conf to ssl vhost in /etc/apache2/sites-enabled/cloud.boxcorea.com.conf

- - - - - - - - - - - - - - - - - - - - - - - - - - - - - - - - - - - - - - - -
Congratulations! You have successfully enabled https://cloud.boxcorea.com
- - - - - - - - - - - - - - - - - - - - - - - - - - - - - - - - - - - - - - - -

IMPORTANT NOTES:
 - Congratulations! Your certificate and chain have been saved at:
   /etc/letsencrypt/live/cloud.boxcorea.com/fullchain.pem
   Your key file has been saved at:
   /etc/letsencrypt/live/cloud.boxcorea.com/privkey.pem
   Your certificate will expire on 2021-04-13. To obtain a new or
   tweaked version of this certificate in the future, simply run
   certbot again with the "certonly" option. To non-interactively
   renew *all* of your certificates, run "certbot renew"
 - If you like Certbot, please consider supporting our work by:

   Donating to ISRG / Let's Encrypt:   https://letsencrypt.org/donate
   Donating to EFF:                    https://eff.org/donate-le
let’s encrypt 인증서의 유효기간은 3개월이다. 따라서 3개월마다 갱신해 주어야 한다.
아래 명령을 실행하면 cron에 자동으로 등록된다.
# certbot renew --dry-run
Saving debug log to /var/log/letsencrypt/letsencrypt.log

- - - - - - - - - - - - - - - - - - - - - - - - - - - - - - - - - - - - - - - -
Processing /etc/letsencrypt/renewal/cloud.boxcorea.com.conf
- - - - - - - - - - - - - - - - - - - - - - - - - - - - - - - - - - - - - - - -
Cert not due for renewal, but simulating renewal for dry run
Plugins selected: Authenticator apache, Installer apache
Account registered.
Simulating renewal of an existing certificate for cloud.boxcorea.com
Performing the following challenges:
http-01 challenge for cloud.boxcorea.com
Waiting for verification...
Cleaning up challenges

- - - - - - - - - - - - - - - - - - - - - - - - - - - - - - - - - - - - - - - -
new certificate deployed with reload of apache server; fullchain is
/etc/letsencrypt/live/cloud.boxcorea.com/fullchain.pem
- - - - - - - - - - - - - - - - - - - - - - - - - - - - - - - - - - - - - - - -

- - - - - - - - - - - - - - - - - - - - - - - - - - - - - - - - - - - - - - - -
Congratulations, all simulated renewals succeeded:
  /etc/letsencrypt/live/cloud.boxcorea.com/fullchain.pem (success)
- - - - - - - - - - - - - - - - - - - - - - - - - - - - - - - - - - - - - - - -
systemctl list-timers 명령으로 확인해 보면, 두번째 항목에 등록된 것이 보인다.
# systemctl list-timers
NEXT                        LEFT        LAST                        PASSED     UNIT                         A>
Wed 2021-01-13 15:09:00 KST 6min left   Wed 2021-01-13 14:39:01 KST 23min ago  phpsessionclean.timer        p>
Wed 2021-01-13 15:49:00 KST 46min left  n/a                         n/a        snap.certbot.renew.timer     s>
Wed 2021-01-13 22:17:10 KST 7h left     Tue 2021-01-12 22:17:10 KST 16h ago    systemd-tmpfiles-clean.timer s>
Thu 2021-01-14 00:00:00 KST 8h left     Wed 2021-01-13 00:00:01 KST 15h ago    logrotate.timer              l>
Thu 2021-01-14 00:00:00 KST 8h left     Wed 2021-01-13 00:00:01 KST 15h ago    man-db.timer                 m>
Thu 2021-01-14 01:21:15 KST 10h left    Wed 2021-01-13 14:40:35 KST 21min ago  motd-news.timer              m>
Thu 2021-01-14 02:43:06 KST 11h left    Wed 2021-01-13 08:36:44 KST 6h ago     apt-daily.timer              a>
Thu 2021-01-14 03:23:04 KST 12h left    Wed 2021-01-13 06:50:45 KST 8h ago     fwupd-refresh.timer          f>
Thu 2021-01-14 06:14:13 KST 15h left    Wed 2021-01-13 06:50:24 KST 8h ago     apt-daily-upgrade.timer      a>
Sun 2021-01-17 03:10:39 KST 3 days left Mon 2021-01-11 11:41:14 KST 2 days ago e2scrub_all.timer            e>
Mon 2021-01-18 00:00:00 KST 4 days left Mon 2021-01-11 11:41:14 KST 2 days ago fstrim.timer                 f>

11 timers listed.
Pass --all to see loaded but inactive timers, too.
이제, apache 웹서버를 재실하여 변경사항을 적용하고, 확인한다.
* 사용
사용은 매우 직관적이라 크게 어려움이 없다.
2 comments
기기만 다를뿐(nuc 사용) 우분투(20.04)가 설치되어있으면 똑같이 적용해도 되나요?
Author
네.. 넥스트 클라우드가 php로 개발된거라 차이 없습니다.