
opensource backup 솔루션인 Bacula 설치와 사용하기.
설치환경
백업서버
IP: 59.29.142.85
Hostname: fox1
OS: Ubuntu 12.04
백업 클라이언트(백업대상 서버)
IP: 59.29.142.120
Hostname: ubuntu-1
OS: ubuntu 12.04
PART I. bacula 서버 설치, 구성
1. Bacula의 구성
director : 백업, 리스토어, 아카이브 등의 동작을 담당.
console : director와의 통신을
storage : 물리 매체에 데이타를 저장, 복구하는 프로그램
file : 백업 클라이언트
catalog:
monitor: director, storage, file 데몬을 모니터링.
2. Bacult 서버 설치
# yun install bacula
3. 백업서버 및 클라이언트 설정
백업디렉토리: /backup/archive
리스토어디렉토리: /backup/restore
# mkdir -p /backup/archive
# mkdir -p /backup/restore
# chown -R bacula:bacula /backup
/etc/bacula/bacula-dir.conf 수정
Director { # define myself
Name = fox1-dir
DIRport = 9101 # where we listen for UA connections
QueryFile = "/etc/bacula/scripts/query.sql"
WorkingDirectory = "/var/lib/bacula"
PidDirectory = "/var/run/bacula"
Maximum Concurrent Jobs = 1
Password = "vOchjaYxGgFnKdbE5me5a3Tp5vs763FyoIhXdqUF733A" # Console pa
ssword
Messages = Daemon
#DirAddress = 127.0.0.1
DirAddress = 59.29.142.85
}

JobDefs {
Name = "DefaultJob"
Type = Backup
Level = Incremental
Client = fox1-fd
FileSet = "Full Set"
Schedule = "WeeklyCycle"
Storage = File
Messages = Standard
Pool = File
Priority = 10
Write Bootstrap = "/var/lib/bacula/%c.bsr"
}

Job {
Name = "BackupClient1"
JobDefs = "DefaultJob"
}

Job {
Name = "RestoreFiles"
Type = Restore
Client=fox1-fd
FileSet="Full Set"
Storage = File
Pool = Default
Messages = Standard
#Where = /nonexistant/path/to/file/archive/dir/bacula-restores
Where = /backup/restore
}

FileSet {
Name = "Full Set"
Include {
Options {
signature = MD5
}

# File = /usr/sbin
File = /home

}

Exclude {
File = /var/lib/bacula
File = /backup
File = /proc
File = /tmp
File = /.journal
File = /.fsck
}
}

Schedule {
Name = "WeeklyCycle"
Run = Full 1st sun at 23:05
Run = Differential 2nd-5th sun at 23:05
Run = Incremental mon-sat at 23:05
}

# This schedule does the catalog. It starts after the WeeklyCycle
Schedule {
Name = "WeeklyCycleAfterBackup"
Run = Full sun-sat at 23:10
}

FileSet {
Name = "Catalog"
Include {
Options {
signature = MD5
}
File = "/var/lib/bacula/bacula.sql"
}
}

Client {
Name = fox1-fd
Address = 59.29.142.85
FDPort = 9102
Catalog = MyCatalog
Password = "UfuZihWIUNJpt6DluctDXbueCwsnl3cE9" # password for FileDae
mon
File Retention = 30 days # 30 days
Job Retention = 6 months # six months
AutoPrune = yes # Prune expired Jobs/Files
}

Storage {
Name = File
# Do not use "localhost" here
Address = 59.29.142.85 # N.B. Use a fully qualified name here
SDPort = 9103
Password = "hamtKHNE27OB7AwGFy5ZfyLzs5ml8OoY4"
Device = FileStorage
Media Type = File
}

Catalog {
Name = MyCatalog
# Uncomment the following line if you want the dbi driver
# dbdriver = "dbi:sqlite3"; dbaddress = 127.0.0.1; dbport =
dbname = "bacula"; DB Address = "localhost"; dbuser = "bacula"; dbpassword = "bacula"
}

Messages {
Name = Standard

mailcommand = "/usr/lib/bacula/bsmtp -h localhost -f \"\(Bacula\) \<%r\>\" -s
\"Bacula: %t %e of %c %l\" %r"
operatorcommand = "/usr/lib/bacula/bsmtp -h localhost -f \"\(Bacula\) \<%r\>\"
-s \"Bacula: Intervention needed for %j\" %r"
mail = root@localhost = all, !skipped
operator = root@localhost = mount
console = all, !skipped, !saved

append = "/var/lib/bacula/log" = all, !skipped
catalog = all
}

Pool {
Name = File
Pool Type = Backup
Recycle = yes # Bacula can automatically recycle Volumes
AutoPrune = yes # Prune expired volumes
Volume Retention = 365 days # one year
Maximum Volume Bytes = 50G # Limit Volume size to something reasonabl
e
Maximum Volumes = 100 # Limit number of Volumes in Pool
}

Pool {
Name = Scratch
Pool Type = Backup
}

Console {
Name = fox1-mon
Password = "8XbAVNy7mm1_YEXmrgavMBAhZXeTsIaTp"
CommandACL = status, .status
}
/etc/bacula-sd.conf 수정
Storage { # definition of myself
Name = fox1-sd
SDPort = 9103 # Director's port
WorkingDirectory = "/var/lib/bacula"
Pid Directory = "/var/run/bacula"
Maximum Concurrent Jobs = 20
# SDAddress = 127.0.0.1
SDAddress = 59.29.142.85
}

Director {
Name = fox1-mon
Password = "W0AUWl0nc7FXfuqC8wHP3Gp1u93IRrV33"
Monitor = yes
}

Device {
Name = FileStorage
Media Type = File
# Archive Device = /nonexistant/path/to/file/archive/dir
Archive Device = /backup/archive
LabelMedia = yes; # lets Bacula label unlabeled media
Random Access = Yes;
AutomaticMount = yes; # when device opened, read it
RemovableMedia = no;
AlwaysOpen = no;
}

Messages {
Name = Standard
director = fox1-dir = all
}
/etc/bacula/bacula-fd.conf 수정
Director {
Name = fox1-dir
Password = "UfuZihWIUNJpt6DluctDXbueCwsnl3cE9"
}

Director {
Name = fox1-mon
Password = "iJnxPgnJ6sg5cF1NZoS57RMlSHS_-Raoe"
Monitor = yes
}

FileDaemon { # this is me
Name = fox1-fd
FDport = 9102 # where we listen for the director
WorkingDirectory = /var/lib/bacula
Pid Directory = /var/run/bacula
Maximum Concurrent Jobs = 20
# FDAddress = 127.0.0.1
FDAddress = 59.29.142.85
}

Messages {
Name = Standard
director = fox1-dir = all, !skipped, !restored
}
/etc/bacula/bconsole.conf
Director {
# Name = localhost-dir
Name = fox1-dir
DIRport = 9101
# address = localhost
address = 59.29.142.85
Password = "vOchjaYxGgFnKdbE5me5a3Tp5vs763FyoIhXdqUF733A"
}
설정후 각 서비스(디렉터, 스토리지, 클라이언트)를 재 실행한다
# /etc/init.d/bacula-director restart
* Stopping Bacula Director... [ OK ]
* Starting Bacula Director... [ OK ]
# /etc/init.d/bacula-sd restart
* Stopping Bacula Storage daemon... [ OK ]
* Starting Bacula Storage daemon... [ OK ]
# /etc/init.d/bacula-fd restart
* Stopping Bacula File daemon... [ OK ]
* Starting Bacula File daemon...
4. 백업 실행
설정이 이상없이되었다면, bconsole 실행하면 아래와 같은 화면이 나온다.
# bconsole
Connecting to Director 59.29.142.85:9101
1000 OK: fox1-dir Version: 5.2.5 (26 January 2012)
Enter a period to cancel a command.

*
*help
Command Description
======= ===========
add Add media to a pool
autodisplay Autodisplay console messages
automount Automount after label
cancel Cancel a job
create Create DB Pool from resource
delete Delete volume, pool or job
disable Disable a job
enable Enable a job
estimate Performs FileSet estimate, listing gives full listing
exit Terminate Bconsole session
gui Non-interactive gui mode
help Print help on specific command
label Label a tape
list List objects from catalog
llist Full or long list like list command
messages Display pending messages
memory Print current memory usage
mount Mount storage
prune Prune expired records from catalog
purge Purge records from catalog
python Python control commands
quit Terminate Bconsole session
query Query catalog
restore Restore files
relabel Relabel a tape
release Release storage
reload Reload conf file
run Run a job
status Report status
setdebug Sets debug level
setip Sets new client address -- if authorized
show Show resource records
sqlquery Use SQL to query catalog
time Print current time
trace Turn on/off trace to file
unmount Unmount storage
umount Umount - for old-time Unix guys, see unmount
update Update volume, pool or stats
use Use catalog xxx
var Does variable expansion
version Print Director version
wait Wait until no jobs are running

When at a prompt, entering a period cancels the command.

*
볼륨을 생성한다.
*add
You probably don't want to be using this command since it
creates database records without labeling the Volumes.
You probably want to use the "label" command.

Defined Pools:
1: Default
2: File
3: Scratch
Select the Pool (1-3): 2
Automatically selected Storage: File
Enter number of Volumes to create. 0=>fixed name. Max=99: 0
Enter Volume name: vol_2
1 Volumes created in pool File
생성한 볼륨의 레이블링 작업
*label
Automatically selected Storage: File
Enter new Volume name: vol_2
Defined Pools:
1: Default
2: File
3: Scratch
Select the Pool (1-3): 2
Connecting to Storage daemon File at 59.29.142.85:9103 ...
Sending label command for Volume "vol_2" Slot 0 ...
3000 OK label. VolBytes=184 DVD=0 Volume="vol_2" Device="FileStorage" (/backup/archive)
Requesting to mount FileStorage ...
3906 File device ""FileStorage" (/backup/archive)" is always mounted.
백업은 정해진 시간에 실행되지만, bconsole에서 실행 할 수 있다.
*run
A job name must be specified.
The defined Job resources are:
1: BackupClient1
2: BackupCatalog
3: RestoreFiles
Select Job resource (1-3): 1
Run Backup job
JobName: BackupClient1
Level: Incremental
Client: fox1-fd
FileSet: Full Set
Pool: File (From Job resource)
Storage: File (From Job resource)
When: 2013-06-12 23:25:23
Priority: 10
OK to run? (yes/mod/no): yes
Job queued. JobId=10
You have messages.
*
실행한 백업의 상태 확인
*status
Status available for:
1: Director
2: Storage
3: Client
4: All
Select daemon type for status (1-4): 1
fox1-dir Version: 5.2.5 (26 January 2012) x86_64-pc-linux-gnu ubuntu 12.04
Daemon started 12-Jun-13 23:17. Jobs: run=1, running=1 mode=0,0
Heap: heap=405,504 smbytes=90,618 max_bytes=91,597 bufs=288 max_bufs=300

Scheduled Jobs:
Level Type Pri Scheduled Name Volume
===================================================================================
Incremental Backup 10 13-Jun-13 23:05 BackupClient1 vol_1
Full Backup 11 13-Jun-13 23:10 BackupCatalog vol_1
====

Running Jobs:
Console connected at 12-Jun-13 23:17
JobId Level Name Status
======================================================================
10 Full BackupClient1.2013-06-12_23.31.48_05 is running
====
백업이 끝나면 아래와 같은 상태가된다.
*st
Status available for:
1: Director
2: Storage
3: Client
4: All
Select daemon type for status (1-4): 3
Automatically selected Client: fox1-fd
Connecting to Client fox1-fd at 59.29.142.85:9102

fox1-fd Version: 5.2.5 (26 January 2012) x86_64-pc-linux-gnu ubuntu 12.04
Daemon started 12-Jun-13 23:30. Jobs: run=1 running=0.
Heap: heap=270,336 smbytes=104,496 max_bytes=365,565 bufs=80 max_bufs=190
Sizeof: boffset_t=8 size_t=8 debug=0 trace=0
Running Jobs:
Director connected at: 12-Jun-13 23:50
No Jobs running.
====

Terminated Jobs:
JobId Level Files Bytes Status Finished Name
======================================================================
5 Full 208 23.06 M OK 12-Jun-13 20:47 BackupClient1
6 Incr 0 0 OK 12-Jun-13 23:05 BackupClient1
10 Full 28,965 9.570 G OK 12-Jun-13 23:46 BackupClient1
====
5. 백업 화일의 복구
여기서는 이름을 알고 있는 화일(/home/snowfox/apache-cloudstack-4.0.1-incubating-src.tar.bz2)을 복구해 보도록 한다.
*restore

First you select one or more JobIds that contain files
to be restored. You will be presented several methods
of specifying the JobIds. Then you will be allowed to
select which files from those JobIds are to be restored.

To select the JobIds, you have the following choices:
1: List last 20 Jobs run
2: List Jobs where a given File is saved
3: Enter list of comma separated JobIds to select
4: Enter SQL list command
5: Select the most recent backup for a client
6: Select backup for a client before a specified time
7: Enter a list of files to restore
8: Enter a list of files to restore before a specified time
9: Find the JobIds of the most recent backup for a client
10: Find the JobIds for a backup for a client before a specified time
11: Enter a list of directories to restore for found JobIds
12: Select full restore to a specified Job date
13: Cancel
Select item: (1-13): 7
Defined Clients:
1: fox1-fd
2: ubuntu-1
Select the Client (1-2): 1
Enter file names with paths, or < to enter a filename
containing a list of file names with paths, and terminate
them with a blank line.
Enter full filename: /home/snowfox/apache-cloudstack-4.0.1-incubating-src.tar.bz2
Enter full filename:
Bootstrap records written to /var/lib/bacula/fox1-dir.restore.3.bsr

The job will require the following
Volume(s) Storage(s) SD Device(s)
===========================================================================

vol_1 File FileStorage

Volumes marked with "*" are online.
1 file selected to be restored.

Run Restore job
JobName: RestoreFiles
Bootstrap: /var/lib/bacula/fox1-dir.restore.3.bsr
Where: /backup/restore
Replace: always
FileSet: Full Set
Backup Client: fox1-fd
Restore Client: fox1-fd
Storage: File
When: 2013-06-13 00:05:04
Catalog: MyCatalog
Priority: 10
Plugin Options: *None*
OK to run? (yes/mod/no): yes
Job queued. JobId=11
*

*st
Status available for:
1: Director
2: Storage
3: Client
4: All
Select daemon type for status (1-4): 1
......생략 .....

10 Full 28,965 9.570 G OK 12-Jun-13 23:46 BackupClient1
11 1 9.223 M OK 13-Jun-13 00:05 RestoreFiles

====
*
/backup/restore 에 복구된 화일이 있는것을 볼 수 있다. (패스 포함)
# ls -al
total 9016
drwxrw-r-- 2 snowfox snowfox 4096 Jun 13 00:05 .
drwxr-x--x 3 root root 4096 Jun 13 00:05 ..
-rw-rw-r-- 1 snowfox snowfox 9223743 Jan 29 04:37 apache-cloudstack-4.0.1-incubating-src.tar.bz2

# pwd
/backup/restore/home/snowfox
PART II. linux 클라이언트 설치, 구성
백업할 클라이언트 환경
OS: ubuntu 12.04
IP: 59.29.142.9
백업 대상: /home
1. bacula 클라이언트 설치
# apt-get install bacula-client
2. bconsole 설정
/etc/bacula/bconsole.conf 를 수정한다. address는 bacula 서버의 ip주소나 hosts 화일에 등록된 hostname을 사용한다. password는 bacula 서버의 bconsole.conf와 동일하게 설정하면된다.
Director {
Name = fox1-dir
DIRport = 9101
# address = localhost
address = fox1 # bacula 서버의 호스트네임 또는 ip주소
# Password = "cO-Hvjg-l_noGgMkQpKHEwAHDBGeszNuR"
Password = "......"
}
3. bacula-fd 설정
/etc/bacula/bacula-fd.conf 를 수정한다.
Director {
Name = fox1-dir # bacula 서버의 디렉터 이름
# Password = "j1QSgOsGBf11Ur2T3KXqwAiMwFvsrC4OH"
Password = "vOchjaYxGgFnKdbE5me5a3Tp5vs763FyoIhXdqUF733A"
}

FileDaemon { # this is me
Name = tech-fd
FDport = 9102 # where we listen for the director
WorkingDirectory = /var/lib/bacula
Pid Directory = /var/run/bacula
Maximum Concurrent Jobs = 20
# FDAddress = 127.0.0.1
FDAddress = 59.29.142.9 #클라이언트 ip 즉, 백업 대상 컴퓨터
}

Messages {
Name = Standard
director = tech-dir = all, !skipped, !restored
}
4. bacula 서버(fox1)에서 클라이언트(tech) 등록.
/etc/bacula/bacula-dir.conf 화일에 아래 내용 등록.
### Linux Client
Client {
Name = tech-fd
Address = 59.29.142.9
FDPort = 9102
Catalog = MyCatalog
Password = "vOchjaYxGgFnKdbE5me5a3Tp5vs763FyoIhXdqUF733A"
File Retention = 7 days
Job Retention = 1 Month
AutoPrune = yes
}
Job{
Name = "tech-fd"
Type = Backup
Client = tech-fd
FileSet = "LinuxClient"
Schedule = "WeeklyCycle"
Storage = File
Messages = Standard
#Pool = Default
Pool = File
Write Bootstrap = "/var/lib/bacula/tech.bsr"
}
FileSet {
Name = "LinuxClient"
Include {
Options {
signature = MD5
}
File = "/home"  # 백업할 디렉토리
}
}
5. 백업의 실행
위와 같이 설정하고, bconsole에서 백업을 실행했지만 아래와같은 메시지와 함께 백업이 진행되지 않음.
Running Jobs:
Console connected at 13-Jun-13 23:26
JobId Level Name Status
======================================================================
14 Full tech-fd.2013-06-13_20.41.07_03 is waiting for an appendable Volume
15 Increme BackupClient1.2013-06-13_23.05.00_06 is waiting execution
16 Full tech-fd.2013-06-13_23.05.00_07 is waiting execution
17 Full BackupCatalog.2013-06-13_23.10.00_08 is waiting execution
====


stat stor=File
Automatically selected Storage: File
Connecting to Storage daemon File at 59.29.142.85:9103

fox1-sd Version: 5.2.5 (26 January 2012) x86_64-pc-linux-gnu ubuntu 12.04
Daemon started 12-Jun-13 23:10. Jobs: run=5, running=0.
Heap: heap=270,336 smbytes=232,641 max_bytes=298,701 bufs=105 max_bufs=109
Sizes: boffset_t=8 size_t=8 int32_t=4 int64_t=8 mode=0,0

Running Jobs:
Writing: Full Backup job tech-fd JobId=14 Volume=""
pool="Default" device="FileStorage" (/backup/archive)
spooling=0 despooling=0 despool_wait=0
Files=0 Bytes=0 Bytes/sec=0
FDReadSeqNo=6 in_msg=6 out_msg=4 fd=5
====

Jobs waiting to reserve a drive:
====

.....

====

Device status:
Device "FileStorage" (/backup/archive) is not open.
Device is BLOCKED waiting to create a volume for:
Pool: Default
Media type: File
====

Used Volume status:
====

====
원인은 Default pool에 속한 볼륨이 없어서 발생. label 커맨드로 vol_3을 Default pool로 만들어고 다시 백업. Pool을 Default 에서 File로 변경.
*label
Automatically selected Storage: File
Enter new Volume name: vol_3
Media record for new Volume "vol_3" already exists.
Enter new Volume name: vol_4
Defined Pools:
1: Default
2: File
3: Scratch
Select the Pool (1-3): 2
Connecting to Storage daemon File at 59.29.142.85:9103 ...
Sending label command for Volume "vol_4" Slot 0 ...
3000 OK label. VolBytes=184 DVD=0 Volume="vol_4" Device="FileStorage" (/backup/archive)
Catalog record for Volume "vol_4", Slot 0 successfully created.
Requesting to mount FileStorage ...
3001 OK mount requested. Device="FileStorage" (/backup/archive)
그래도 잘 안됨.
6. Restore
Restore는 별도 설정이 없는한 서버의 standard restore template를 사용한다.
만약, bacula server의 Restore job이 아래와 같다면,
Job {
Name = "RestoreFiles"
Type = Restore
Client=fox1-fd
FileSet="Full Set"
Storage = File
Pool = Default
Messages = Standard
#Where = /nonexistant/path/to/file/archive/dir/bacula-restores
Where = /backup/restore
}
Restore 한 화일은 는 클라이언트의 /backup/restore에 저장된다. 따라서 클라이언트에 /backup/restore 디렉토리가 없다면, Restore가 되지 않는다. 그냥 간단히 필요한 디렉토리를 만들어주면 된다.
PART III. Bacula 윈도우즈 클라이언트의 설치와 사용.
윈도우용 클라이언트의 설치 방법은 생략한다.
1. 윈도우 클라이언트(XP)의 설정
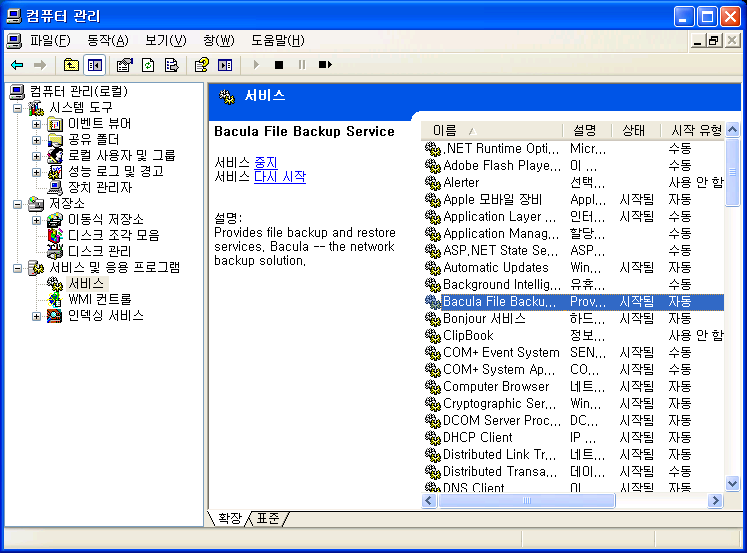
시작->모든프로그램->Bacula->Configuration->Edit Client Configuration

아래는 Bacula 클라이언트를 c:\Bacula 에 설치한 경우 client 설정화일이다.
FileDaemon { # this is me
Name = boxcorea-pc
FDport = 9102 # where we listen for the director
WorkingDirectory = "C:\Bacula\working"
Pid Directory = "C:\Bacula\working"
# Plugin Directory = "C:\Bacula\plugins"
Maximum Concurrent Jobs = 10
}

#
# List Directors who are permitted to contact this File daemon
#
Director {
Name = fox1-dir
Password = "디렉터의비밀번호와 같게 설정"
}

#
# Restricted Director, used by tray-monitor to get the
# status of the file daemon
#
Director {
Name = fox1-mon
Password = "모니터패스워드"
Monitor = yes
}

# Send all messages except skipped files back to Director
Messages {
Name = Standard
director = fox1-dir = all, !skipped, !restored
}
위와 같이 설정한 후, bacula client 서비스를 실행한다.
그러면 아래와 같은 오류메시지가 나올 것이다.
“로컬 컴퓨터에서 Bacula File Backup Service를 시작하지 못했습니다. 오류 1067: 프로세스가 예기치 않게 종료되었습니다.”
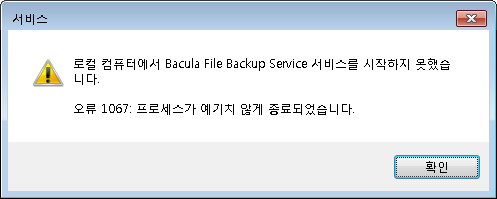
물론 설정이 잘못되어 나오는 문제다. 나는 설정을 아래와 같이 바꾸어서 해결했다. 윈도우의 “\” 를 유닉스 스타일의 “/”로 바꾸어 주어야 한다.
FileDaemon { # this is me
Name = boxcorea-pc
FDport = 9102 # where we listen for the director
WorkingDirectory = "C:/Bacula/working"
Pid Directory = "C:/Bacula/working"
# Plugin Directory = "C:/Bacula/plugins"
Maximum Concurrent Jobs = 10
# FDAddress = 115.86.218.40
FDAddress = 192.168.100.20  #사설아이피를 사용한다면(즉, PC가 공유기 뒤에 있다면 실제 PC가 사용하는 IP를 사용해야한다)
}

#
# List Directors who are permitted to contact this File daemon
#
Director {
Name = fox1-dir
Password = "디렉터(백업서버)의 비밀번호"
}

#
# Restricted Director, used by tray-monitor to get the
# status of the file daemon
#
Director {
Name = fox1-mon
Password = "모니터의 비밀번호"  #설마, 정말로 '모니터의비밀번호'라고 넣지는 말자.
#Password = "iJnxPgnJ6sg5cF1NZoS57RMlSHS_-Raoe"
Monitor = yes
}

# Send all messages except skipped files back to Director
Messages {
Name = Standard
director = fox1-dir = all, !skipped, !restored
}
이렇게 설정을 바꾸고 다시 클라이언트 서비스를 실행하면, 이상없이 잘 작동할 것이다.
2. 백업서버(bacula-dir.conf)설정.
이제, 백업서버에서 위의 클라이언트를 백업하도록 설정한다. 기본적인 백업 설정은 이전의 Part I부분을 참고하면된다.
여기서는 추가되는 부분만 확인할 것이다. /etc/bacula/bacula-dir.conf 에 아래 내용을 추가한다.
# Windows Backup over the WAN
Client {
Name = boxcorea-pc
Address = 115.86.218.40   # 공유기를 사용할때 공유기의 WAN IP
FDPort = 9102
Catalog = MyCatalog
Password = "비밀번호..."
File Retention = 7 days
Job Retention = 1 Month
AutoPrune = yes
}
Job{
Name = "boxcorea-pc"
Type = Backup
Client = boxcorea-pc
FileSet = "WindowsClient"
Schedule = "WeeklyCycle"
Storage = File
Messages = Standard
Pool = File
Write Bootstrap = "/var/lib/bacula/tech.bsr"
}
FileSet {
Name = "WindowsClient"
Include {
Options {
signature = MD5
}
#File = "c:\Backup" # 이렇게 설정하면 오류는 나오지 않는다. 하지만 어떤 화일도 백업되지 않는다!!!
File = "c:/Backup"    # 이렇게 해야 제대로 백업된다. 윈도우라고 "\"를 쓰지는 말자.
}
}
bconsole을 통해 백업을 실행해 본다.
*st client

... 생략 ...

JobId Level Files Bytes Status Finished Name
======================================================================
49 Full 1 0 OK 18-Jun-13 23:50 boxcorea-pc
50 Full 4 91.33 M OK 18-Jun-13 23:52 boxcorea-pc
이것으로 Bacula Backup 관련 글은 Backup용 Tape Library가 생길때 까지 정지 !!!
오류와 해결)
아래는, bacula Catalog 백업이 처음 부터 오류가 난경우.
36 Incr 1 5.453 K OK 17-Jun-13 23:05 BackupClient1
37 Incr 0 0 OK 17-Jun-13 23:05 tech-fd
38 Full 0 0 Error 17-Jun-13 23:10 BackupCatalog
39 Full 0 0 Error 18-Jun-13 13:39 BackupCatalog
40 Incr 7 21.73 M OK 18-Jun-13 13:40 tech-fd
확인을 해 본 결과 아래와 /etc/bacula/scripts에 관련 화일이 없는 것을 발견했다.
# ls
delete_catalog_backup   dvd-handler   mtx-changer.conf
disk-changer   mtx-changer
정상적인 경우는 아래와 같다.
# ls
btraceback.gdb   make_catalog_backup   mtx-changer.conf
delete_catalog_backup   make_catalog_backup_awk     query.sql
disk-changer     make_catalog_backup.pl
dvd-handler     mtx-changer
위의 화일들을 다른 서버에 설치해서 복사해 넣으니 카달로그 백업이 잘 수행되었다.