
Netbackup 구성하기 – part 1(설치)
Netbackup 구성 환경
- Netbackup Server : CentOS 7 minimal, mhvtl, Netbackup 7.5, 192.168.100.51, hostname: wolf_storage
- Netbackup Client : CentOS 6 minimal
mhvtl은 https://blog.boxcorea.com/wp/archives/1368 를 참고.
1. 넷백업 서버 설치
넷백업 설치화일을 풀어 놓고, 인스톨러를 실행한다. 중간에 라이센스 키를 입력해야 설치가 진행되므로, 라이센스키를 준비해야 한다.
설치 중간중간 입력해야하는 부분들이 있다. 설치과정은 아래와 같다.
# ./install


Symantec Installation Script
Copyright 1993 - 2012 Symantec Corporation, All Rights Reserved.


	Installing NetBackup Server Software


Please review the SYMANTEC SOFTWARE LICENSE AGREEMENT located on
the installation media before proceeding.  The agreement includes
details on the NetBackup Product Improvement Program.

For NetBackup installation and upgrade information specific to your
platform and to find out if your installed EEBs or hot fixes are
contained in this release, check out the Symantec Operations Readiness
Tools (SORT) Installation and Upgrade Checklist and Hot fix and EEB
Release Auditor, respectively, at https://sort.symantec.com/netbackup.

ATTENTION!  To help ensure a successful upgrade to NetBackup 7.5,
please visit the NetBackup 7.5 Upgrade Portal:
http://www.symantec.com/docs/TECH74584.

Do you wish to continue? [y,n] (y) y

Participate in the NetBackup Product Improvement Program? [y,n] (y) n

NOTE:
CPI  V-9-0-0

0 No padv object defined for padv RHEL3x8664 for system wolf-storage


The NetBackup and Media Manager software is built for use on LINUX_RH_X86 hardware.
Do you want to install NetBackup and Media Manager files? [y,n] (y)

NetBackup and Media Manager are normally installed in /usr/openv.
Is it OK to install in /usr/openv? [y,n] (y)

Saving server binaries for LINUX_RH_X86.

Reading NetBackup files from /mnt/NetBackup_7.5_LinuxR_x86_64/linuxR_x86/anb

Checking for pre-existing SYMCnetbp package.
Installing SYMCnetbp package.
openv/netbackup/client/Linux/
openv/netbackup/client/Linux/SuSE2.6.16/
openv/netbackup/client/Linux/SuSE2.6.16/client_config
openv/netbackup/client/Linux/SuSE2.6.16/cp_to_client
openv/netbackup/client/Linux/SuSE2.6.16/extract_java
openv/netbackup/client/Linux/SuSE2.6.16/install_client
openv/netbackup/client/Linux/SuSE2.6.16/ftp_to_client
openv/netbackup/client/Linux/SuSE2.6.16/sftp_to_client
openv/netbackup/client/Linux/SuSE2.6.16/ssh_to_client
openv/netbackup/client/Linux/SuSE2.6.16/move_libs
openv/netbackup/client/Linux/SuSE2.6.16/version
openv/netbackup/client/Linux/SuSE2.6.16/pddeagent.tar.gz
openv/netbackup/client/Linux/SuSE2.6.16/pdinstall
openv/netbackup/client/Linux/SuSE2.6.16/PBX.tar.gz
openv/netbackup/client/Linux/SuSE2.6.16/installpbx
openv/netbackup/client/Linux/SuSE2.6.16/tar
openv/netbackup/client/Linux/SuSE2.6.16/nbj.conf
openv/netbackup/client/Linux/SuSE2.6.16/JRE.tar.gz
openv/netbackup/client/Linux/SuSE2.6.16/.sizes_JRE
openv/netbackup/client/Linux/SuSE2.6.16/client_bin.tar.gz
openv/netbackup/client/Linux/SuSE2.6.16/.sizes_client_bin
openv/netbackup/client/Linux/SuSE2.6.16/.sizes
openv/netbackup/client/Linux/SuSE2.6.16/NB-Java.tar.gz
openv/netbackup/client/Linux/SuSE2.6.16/.sizes_NB-Java
openv/netbackup/client/Linux/RedHat2.6.18/
openv/netbackup/client/Linux/RedHat2.6.18/client_config
openv/netbackup/client/Linux/RedHat2.6.18/cp_to_client
openv/netbackup/client/Linux/RedHat2.6.18/extract_java
openv/netbackup/client/Linux/RedHat2.6.18/install_client
openv/netbackup/client/Linux/RedHat2.6.18/ftp_to_client
openv/netbackup/client/Linux/RedHat2.6.18/sftp_to_client
openv/netbackup/client/Linux/RedHat2.6.18/ssh_to_client
openv/netbackup/client/Linux/RedHat2.6.18/move_libs
openv/netbackup/client/Linux/RedHat2.6.18/version
openv/netbackup/client/Linux/RedHat2.6.18/pddeagent.tar.gz
openv/netbackup/client/Linux/RedHat2.6.18/pdinstall
openv/netbackup/client/Linux/RedHat2.6.18/PBX.tar.gz
openv/netbackup/client/Linux/RedHat2.6.18/installpbx
openv/netbackup/client/Linux/RedHat2.6.18/tar
openv/netbackup/client/Linux/RedHat2.6.18/nbj.conf
openv/netbackup/client/Linux/RedHat2.6.18/JRE.tar.gz
openv/netbackup/client/Linux/RedHat2.6.18/.sizes_JRE
openv/netbackup/client/Linux/RedHat2.6.18/client_bin.tar.gz
openv/netbackup/client/Linux/RedHat2.6.18/.sizes_client_bin
openv/netbackup/client/Linux/RedHat2.6.18/.sizes
openv/netbackup/client/Linux/RedHat2.6.18/NB-Java.tar.gz
openv/netbackup/client/Linux/RedHat2.6.18/.sizes_NB-Java
openv/netbackup/client/Linux/IBMzSeriesRedHat2.6.18/
openv/netbackup/client/Linux/IBMzSeriesRedHat2.6.18/client_config
openv/netbackup/client/Linux/IBMzSeriesRedHat2.6.18/cp_to_client
openv/netbackup/client/Linux/IBMzSeriesRedHat2.6.18/extract_java
openv/netbackup/client/Linux/IBMzSeriesRedHat2.6.18/install_client
openv/netbackup/client/Linux/IBMzSeriesRedHat2.6.18/ftp_to_client
openv/netbackup/client/Linux/IBMzSeriesRedHat2.6.18/sftp_to_client
openv/netbackup/client/Linux/IBMzSeriesRedHat2.6.18/ssh_to_client
openv/netbackup/client/Linux/IBMzSeriesRedHat2.6.18/move_libs
openv/netbackup/client/Linux/IBMzSeriesRedHat2.6.18/version
openv/netbackup/client/Linux/IBMzSeriesRedHat2.6.18/PBX.tar.gz
openv/netbackup/client/Linux/IBMzSeriesRedHat2.6.18/installpbx
openv/netbackup/client/Linux/IBMzSeriesRedHat2.6.18/tar
openv/netbackup/client/Linux/IBMzSeriesRedHat2.6.18/nbj.conf
openv/netbackup/client/Linux/IBMzSeriesRedHat2.6.18/JRE.tar.gz
openv/netbackup/client/Linux/IBMzSeriesRedHat2.6.18/.sizes_JRE
openv/netbackup/client/Linux/IBMzSeriesRedHat2.6.18/client_bin.tar.gz
openv/netbackup/client/Linux/IBMzSeriesRedHat2.6.18/.sizes_client_bin
openv/netbackup/client/Linux/IBMzSeriesRedHat2.6.18/.sizes
openv/netbackup/client/Linux/IBMzSeriesRedHat2.6.18/NB-Java.tar.gz
openv/netbackup/client/Linux/IBMzSeriesRedHat2.6.18/.sizes_NB-Java
openv/netbackup/client/Linux/IBMpSeriesSuSE2.6/
openv/netbackup/client/Linux/IBMpSeriesSuSE2.6/client_config
openv/netbackup/client/Linux/IBMpSeriesSuSE2.6/cp_to_client
openv/netbackup/client/Linux/IBMpSeriesSuSE2.6/extract_java
openv/netbackup/client/Linux/IBMpSeriesSuSE2.6/install_client
openv/netbackup/client/Linux/IBMpSeriesSuSE2.6/ftp_to_client
openv/netbackup/client/Linux/IBMpSeriesSuSE2.6/sftp_to_client
openv/netbackup/client/Linux/IBMpSeriesSuSE2.6/ssh_to_client
openv/netbackup/client/Linux/IBMpSeriesSuSE2.6/move_libs
openv/netbackup/client/Linux/IBMpSeriesSuSE2.6/version
openv/netbackup/client/Linux/IBMpSeriesSuSE2.6/PBX.tar.gz
openv/netbackup/client/Linux/IBMpSeriesSuSE2.6/installpbx
openv/netbackup/client/Linux/IBMpSeriesSuSE2.6/tar
openv/netbackup/client/Linux/IBMpSeriesSuSE2.6/client_bin.tar.gz
openv/netbackup/client/Linux/IBMpSeriesSuSE2.6/.sizes_client_bin
openv/netbackup/client/Linux/IBMpSeriesSuSE2.6/.sizes
openv/netbackup/client/Linux/IBMpSeriesRedHat2.6/
openv/netbackup/client/Linux/IBMpSeriesRedHat2.6/client_config
openv/netbackup/client/Linux/IBMpSeriesRedHat2.6/cp_to_client
openv/netbackup/client/Linux/IBMpSeriesRedHat2.6/extract_java
openv/netbackup/client/Linux/IBMpSeriesRedHat2.6/install_client
openv/netbackup/client/Linux/IBMpSeriesRedHat2.6/ftp_to_client
openv/netbackup/client/Linux/IBMpSeriesRedHat2.6/sftp_to_client
openv/netbackup/client/Linux/IBMpSeriesRedHat2.6/ssh_to_client
openv/netbackup/client/Linux/IBMpSeriesRedHat2.6/move_libs
openv/netbackup/client/Linux/IBMpSeriesRedHat2.6/version
openv/netbackup/client/Linux/IBMpSeriesRedHat2.6/PBX.tar.gz
openv/netbackup/client/Linux/IBMpSeriesRedHat2.6/installpbx
openv/netbackup/client/Linux/IBMpSeriesRedHat2.6/tar
openv/netbackup/client/Linux/IBMpSeriesRedHat2.6/client_bin.tar.gz
openv/netbackup/client/Linux/IBMpSeriesRedHat2.6/.sizes_client_bin
openv/netbackup/client/Linux/IBMpSeriesRedHat2.6/.sizes
openv/netbackup/client/Linux/IBMzSeriesSuSE2.6.16/
openv/netbackup/client/Linux/IBMzSeriesSuSE2.6.16/client_config
openv/netbackup/client/Linux/IBMzSeriesSuSE2.6.16/cp_to_client
openv/netbackup/client/Linux/IBMzSeriesSuSE2.6.16/extract_java
openv/netbackup/client/Linux/IBMzSeriesSuSE2.6.16/install_client
openv/netbackup/client/Linux/IBMzSeriesSuSE2.6.16/ftp_to_client
openv/netbackup/client/Linux/IBMzSeriesSuSE2.6.16/sftp_to_client
openv/netbackup/client/Linux/IBMzSeriesSuSE2.6.16/ssh_to_client
openv/netbackup/client/Linux/IBMzSeriesSuSE2.6.16/move_libs
openv/netbackup/client/Linux/IBMzSeriesSuSE2.6.16/version
openv/netbackup/client/Linux/IBMzSeriesSuSE2.6.16/PBX.tar.gz
openv/netbackup/client/Linux/IBMzSeriesSuSE2.6.16/installpbx
openv/netbackup/client/Linux/IBMzSeriesSuSE2.6.16/tar
openv/netbackup/client/Linux/IBMzSeriesSuSE2.6.16/nbj.conf
openv/netbackup/client/Linux/IBMzSeriesSuSE2.6.16/JRE.tar.gz
openv/netbackup/client/Linux/IBMzSeriesSuSE2.6.16/.sizes_JRE
openv/netbackup/client/Linux/IBMzSeriesSuSE2.6.16/client_bin.tar.gz
openv/netbackup/client/Linux/IBMzSeriesSuSE2.6.16/.sizes_client_bin
openv/netbackup/client/Linux/IBMzSeriesSuSE2.6.16/.sizes
openv/netbackup/client/Linux/IBMzSeriesSuSE2.6.16/NB-Java.tar.gz
openv/netbackup/client/Linux/IBMzSeriesSuSE2.6.16/.sizes_NB-Java
openv/netbackup/client/Linux/Debian2.6.18/
openv/netbackup/client/Linux/Debian2.6.18/client_config
openv/netbackup/client/Linux/Debian2.6.18/cp_to_client
openv/netbackup/client/Linux/Debian2.6.18/extract_java
openv/netbackup/client/Linux/Debian2.6.18/install_client
openv/netbackup/client/Linux/Debian2.6.18/ftp_to_client
openv/netbackup/client/Linux/Debian2.6.18/sftp_to_client
openv/netbackup/client/Linux/Debian2.6.18/ssh_to_client
openv/netbackup/client/Linux/Debian2.6.18/move_libs
openv/netbackup/client/Linux/Debian2.6.18/version
openv/netbackup/client/Linux/Debian2.6.18/pddeagent.tar.gz
openv/netbackup/client/Linux/Debian2.6.18/pdinstall
openv/netbackup/client/Linux/Debian2.6.18/PBX.tar.gz
openv/netbackup/client/Linux/Debian2.6.18/installpbx
openv/netbackup/client/Linux/Debian2.6.18/tar
openv/netbackup/client/Linux/Debian2.6.18/nbj.conf
openv/netbackup/client/Linux/Debian2.6.18/JRE.tar.gz
openv/netbackup/client/Linux/Debian2.6.18/.sizes_JRE
openv/netbackup/client/Linux/Debian2.6.18/client_bin.tar.gz
openv/netbackup/client/Linux/Debian2.6.18/.sizes_client_bin
openv/netbackup/client/Linux/Debian2.6.18/.sizes
openv/netbackup/client/Linux/Debian2.6.18/NB-Java.tar.gz
openv/netbackup/client/Linux/Debian2.6.18/.sizes_NB-Java

Done executing NB.inst.

If you ran NB.inst instead of <cdrom_path>/install, you must
run /usr/openv/netbackup/bin/install_bp to initiate NetBackup.
Running /usr/openv/netbackup/bin/install_bp

Copying RedHat2.6.18 Client Binaries

Installing PBX...
Please wait while installation is in progress...
Installation completed Successfully
Installation log located here: /var/tmp/installpbx-2696-031517080922.log


Unpacking SYMCnbclt package.
Checking for pre-existing SYMCnbclt package.
Installing SYMCnbclt package.
Installation of SYMCnbclt was successful.
More details regarding SYMCnbclt can be found in file
/tmp/install_cltpkg_trace.2680 on wolf-storage.

Terminating NetBackup and/or Media Manager processes.

Installing NB-Java.

Unpacking SYMCnbjava package.
Checking for pre-existing SYMCnbjava package.
Installing SYMCnbjava package.
Installation of SYMCnbjava was successful.
More details regarding SYMCnbjava can be found in file
/tmp/install_javapkg_trace.3532 on wolf-storage.

Unpacking SYMCnbjre package.
Checking for pre-existing SYMCnbjre package.
Installing SYMCnbjre package.
Installation of SYMCnbjre was successful.
More details regarding SYMCnbjre can be found in file
/tmp/install_jrepkg_trace.3532 on wolf-storage.
+ /bin/cp ./nbj.conf /usr/openv/java

Directory /usr/openv/logs does not exist.
No log files to migrate.

No previous install detected.  Performing a fresh install.
+ Extracting PDDE server package (/usr/openv/pddeserver.tar.gz)...
Using /tmp/pdde_pkg to store temporary package data.
Unpacking SYMCpddes package.
Checking for pre-existing SYMCpddes package.
Installing SYMCpddes package.
+ Extracting PDDE agent package (/usr/openv/netbackup/client/Linux/RedHat2.6.18/pddeagent.tar.gz)...
Using /tmp/pdde_pkg to store temporary package data.
Unpacking SYMCpddea package.
Checking for pre-existing SYMCpddea package.
Installing SYMCpddea package.
Creating /etc/pdregistry.cfg.
Saving a copy of the uninstall script to /opt/pdde/pddeuninstall.sh
Starting setup for PDDE script
pdregistry.cfg exists.
Done setup for PDDE script
Checking to see if the PDDE configuration needs upgrading
Agent config file path found: {/etc/puredisk/Agent.cfg}
Making changes to /usr/openv/lib/ost-plugins/pd.conf
RESTORE_DECRYPT_LOCAL already in pd.conf
PREFETCH_SIZE already in pd.conf
META_SEGKSIZE already in pd.conf
Making changes to /usr/openv/lib/ost-plugins/pd.conf
FIBRECHANNEL already in pd.conf

PDDE install finished successfully.
Version now installed:
7.0000.0012.0118
Full PDDE installation log saved to: /var/log/puredisk/2017-03-15_08:10-pdde-install.log


The following automatic startup and shutdown scripts (respectively)
have been installed.  They will cause the NetBackup daemons to be
automatically shut down and restarted each time the system boots.

/etc/rc.d/rc2.d/S77netbackup
/etc/rc.d/rc3.d/S77netbackup
/etc/rc.d/rc5.d/S77netbackup
/etc/rc.d/rc0.d/K01netbackup
/etc/rc.d/rc1.d/K01netbackup
/etc/rc.d/rc6.d/K01netbackup


Installation of Java LiveUpdate agent succeeded.  Refer to file
/tmp/JLU-Log/JavaLiveUpdate-Install.log on wolf-storage
for installation details.


Checking LiveUpdate registration for the following products: NB CLT
This may take a few minutes.

Product NB is installed and will be registered.
Product CLT_Linux-PSERIES is installed and will be registered.
Product CLT_Linux-ZSERIES is installed and will be registered.

Updating LiveUpdate registration now...this may take some time.


A NetBackup Server or Enterprise Server license key is needed
for installation to continue.

Enter license key:
DEX3-****-****-****-****-****-****-****-7UN

DEX3-****-****-****-****-****-****-****-7UN:
	NetBackup Enterprise Server Base product with all the features enabled
	has been registered.


All additional keys should be added at this time.
Do you want to add additional license keys now? [y,n] (y)


	License Key Utility
	-------------------

	A) Add a License Key
	D) Delete a License Key
	F) List Active License Keys
	L) List Registered License Keys
	H) Help
	q) Quit License Key Utility


Enter a letter: Q


Installing NetBackup Enterprise Server version: 7.5


If this machine will be using a different network interface than the
default (wolf-storage), the name of the preferred interface should be used
as the configured server name.  If this machine will be part of a
cluster, the virtual name should be used as the configured server name.

Would you like to use "wolf-storage" as the configured
NetBackup server name of this machine? [y,n] (y)

Is wolf-storage the master server? [y,n] (y)


Media servers can be added during this installation or
to a NetBackup environment after installation completes.
Refer to the NetBackup Administrator's Guide, Volume I for
more information.

Do you want to add any media servers now? [y,n] (n)

Checking network connections.
bp.conf: IP_ADDRESS_FAMILY = AF_INET: default value, no update needed

TELEMETRY_UPLOAD value NO saved.

Sending SIGHUP to inetd process.


NetBackup maintains a centralized catalog (separate from the image
catalog) for data related to media and device configuration, device
management, storage units, hosts and host aliases, media server status,
NDMP credentials, and other information.  This is managed by the
Enterprise Media Manager server.

Enter the Enterprise Media Manager server (default: wolf-storage):

Converting STREAMS files.  This may take a few minutes.

STREAMS files conversion is complete.


Successfully updated the session cache parameters.
Starting the NetBackup network daemon.
Starting the NetBackup client daemon.
Starting the NetBackup SAN Client Fibre Transport daemon.
Creating /usr/openv/tmp/sqlany

Installed SQL Anywhere Version 11.0.1.2645
Installation completed successfully

set_value: Key "AZDBPasswordFilePath" successfully updated
AZ database setup complete.

Database server is NB_wolf-storage
Creating the NetBackup database.
Creating NetBackup staging directory in: /usr/openv/db/staging
Starting the NetBackup database.
Authenticating the NetBackup database.
VXDBMS_NB_DATA entry in bp.conf updated successfully.
Setting of database authentication for NBDB successful.
Change of dba password for NBDB successful.

Creating the NetBackup database files.
Creating the NetBackup database schema.
Verifying the running version of NBDB ...
NBDB version 7.5.0.0 verified.
Nothing to upgrade. Version unchanged.
Database [NBDB] validation successful.
Database [NBDB] is alive and well on server [NB_wolf-storage].
Creating the NetBackup Authorization database.

Migrating SLP definitions into the NetBackup relational database.


Starting the NetBackup Event Manager.


Starting the NetBackup Audit Manager.

Starting the NetBackup Deduplication Manager.
Starting the NetBackup Deduplication Engine.

Starting the NetBackup database manager process (bpdbm).

Creating Directive Set for LotusNotes
Creating Directive Set for MS_Exchange_Mailbox
Creating Directive Set for MS_Exchange_Database
Creating Directive Set for MS_Exchange_Public_Folders
Creating Directive Set for MS_Exchange_Database_Availability_Groups
Creating Directive Set for MS_SharePoint_Portal_Server
Creating Template Set for Oracle_RMAN
Creating Template Set for Oracle_XML_Export
Creating Template Set for DB2
Creating Directive Set for Windows2003
Creating Directive Set for Windows2008
Creating Directive Set for Enterprise_Vault_7.5
Creating Directive Set for Enterprise_Vault_8.0
Creating Directive Set for Enterprise_Vault_9.0
Creating Directive Set for Enterprise_Vault_10.0
Creating Directive Set for NB_SearchServer
Creating Directive Set for NDMP

Converting snapshot policies:

Policy conversion summary:
	Number of original policies:			0
	Number of non-snapshot policies skipped:	0
	Number of policies not needing conversion:	0
	Number of policies converted to
	  'auto' snapshot method:			0
	Number of policies converted:			0

Updating client hardware definitions:

Hardware update conversion summary:
	Number of policies processed:			      0
	Number of policies with affected clients:	      0
	Number of clients processed:			      0
	Number of clients converted:			      0
	Number of Disaster Recovery flags cleared:	      0

Starting the NetBackup compatibility daemon.
Starting the NetBackup Enterprise Media Manager.
Starting the NetBackup Resource Broker.

Populating the database tables.  This will take some time.

Starting the Media Manager device daemon processes.

Do you want to start the job-related NetBackup daemons
so backups and restores can be initiated? [y,n] (y)
Starting the NetBackup request daemon process (bprd).
Starting the NetBackup Job Manager.
Starting the NetBackup Policy Execution Manager.
Starting the NetBackup Storage Lifecycle Manager.
Starting the NetBackup Indexing Manager.

Starting the NetBackup Remote Monitoring Management System.
Starting the NetBackup Key Management daemon.
Starting the NetBackup Service Layer.
Starting the NetBackup Agent Request Server.
Starting the NetBackup Bare Metal Restore daemon.
Starting the NetBackup Vault daemon.
Starting the NetBackup CloudStore Service Container.
Starting the NetBackup Service Monitor.
Starting the NetBackup Bare Metal Restore Boot Server daemon.


OpsCenter is the next-generation monitoring, reporting and
administrative solution designed to centrally manage one or
more NetBackup installations from a web browser.  Existing
NetBackup Operations Manager or Veritas Backup Reporter
installations can be upgraded to OpsCenter.

If an OpsCenter server already exists in your environment
or you plan to install one, enter the real hostname of that
OpsCenter server here.  Do not use a virtual name.  If you
do not want this local machine to be an OpsCenter server,
enter NONE.

Enter the OpsCenter server (default: NONE):


NetBackup server installation complete.

NOTE:
CPI  V-9-0-0

0 No padv object defined for padv RHEL3x8664 for system wolf-storage


File /usr/openv/tmp/install_trace.2059 contains a trace of this install.
That file can be deleted after you are sure the install was successful.
2. Netbackup client 설치
넷백업 클라이언트는 넷백업 서버의 커맨드라인에서 설치할 수도 있고, administration console에서도 설치할 수 있다.
커맨드라인 설치를 위해서는 먼저 해당 클라이언트의 설치화일이 있는 곳으로 이동해야한다. 여기서는 CentOS 6 에 클라이언트를 설치한다. 설치는 rsh, sftp, ssh, ftp중 하나를 통해서 진행하기 때문에 서버에서 클라이언트로 이 중 하나는 반드시 접속할 수 있어야 한다.
# pwd
/usr/openv/netbackup/client/Linux/RedHat2.6.18
sftp를 통한 설치를 진행한다.
# `pwd`/sftp_to_client fox1 root
root@fox1's password:
Connected to fox1.

sftp completed successfully.

The root user on fox1 must now execute the command
"sh /tmp/bp.16136/client_config [-L]".  The optional argument, "-L",
is used to avoid modification of the client's current bp.conf file.
이제, fox1 에서 아래 명령어를 실행해준다.
# sh /tmp/bp.16136/client_config -L
Blocksize = 20 records
./
./bp_servers
./bp_client_name

Installing PBX...
Please wait while installation is in progress...
Installation completed Successfully
Installation log located here: /var/tmp/installpbx-1298-031617115643.log


Unpacking SYMCnbclt package.
Checking for pre-existing SYMCnbclt package.
Installing SYMCnbclt package.
Installation of SYMCnbclt was successful.
More details regarding SYMCnbclt can be found in file
/tmp/install_cltpkg_trace.1211 on localhost.localdomain.

Terminating NetBackup and/or Media Manager processes.

Checking network connections.
bp.conf: IP_ADDRESS_FAMILY = AF_INET: default value, no update needed

Installing NB-Java.

Unpacking SYMCnbjava package.
Checking for pre-existing SYMCnbjava package.
Installing SYMCnbjava package.
Installation of SYMCnbjava was successful.
More details regarding SYMCnbjava can be found in file
/tmp/install_javapkg_trace.2133 on localhost.localdomain.

Unpacking SYMCnbjre package.
Checking for pre-existing SYMCnbjre package.
Installing SYMCnbjre package.
Installation of SYMCnbjre was successful.
More details regarding SYMCnbjre can be found in file
/tmp/install_jrepkg_trace.2133 on localhost.localdomain.

Directory /usr/openv/logs does not exist.
No log files to migrate.

No previous install detected.  Performing a fresh install.
+ Extracting PDDE agent package (/tmp/bp.16136/pddeagent.tar.gz)...
Using /tmp/pdde_pkg to store temporary package data.
Unpacking SYMCpddea package.
Checking for pre-existing SYMCpddea package.
Installing SYMCpddea package.
Creating /etc/pdregistry.cfg.
Saving a copy of the uninstall script to /opt/pdde/pddeuninstall.sh
Checking to see if the PDDE configuration needs upgrading
Agent config file path found: {/etc/puredisk/Agent.cfg}
Making changes to /usr/openv/lib/ost-plugins/pd.conf
RESTORE_DECRYPT_LOCAL already in pd.conf
PREFETCH_SIZE already in pd.conf
META_SEGKSIZE already in pd.conf
Making changes to /usr/openv/lib/ost-plugins/pd.conf
FIBRECHANNEL already in pd.conf

PDDE install finished successfully.
Version now installed:
7.0000.0012.0118
Full PDDE installation log saved to: /var/log/puredisk/2017-03-16_11:57-pdde-install.log


The following automatic startup and shutdown scripts (respectively)
have been installed.  They will cause the NetBackup daemons to be
automatically shut down and restarted each time the system boots.

/etc/rc.d/rc2.d/S77netbackup
/etc/rc.d/rc3.d/S77netbackup
/etc/rc.d/rc5.d/S77netbackup
/etc/rc.d/rc0.d/K01netbackup
/etc/rc.d/rc1.d/K01netbackup
/etc/rc.d/rc6.d/K01netbackup


Successfully updated the session cache parameters.
Starting vnetd...
Starting bpcd...
Starting nbftclnt...
Starting bmrbd...

Installation of Java LiveUpdate agent succeeded.  Refer to file
/tmp/JLU-Log/JavaLiveUpdate-Install.log on localhost.localdomain
for installation details.


Checking LiveUpdate registration for the following products: CLT
This may take a few minutes.

Product CLT is installed and will be registered.

Updating LiveUpdate registration now...this may take some time.


Client install complete.
3. Administration Console 실행
설치 위치를 변경하지 않았다면, 넷백업 관련 화일은 /usr/openv/netbackup 에서 찾을 수 있을 것이다. 아래 커맨드를 실행하면 넷백업 관리콘솔이 실행 된다.
# /usr/openv/netbackup/bin/jnbSA

(리눅스 계정의)root의 비밀번호를 입력하면, 다음과 같은 화면을 볼 수 있다.
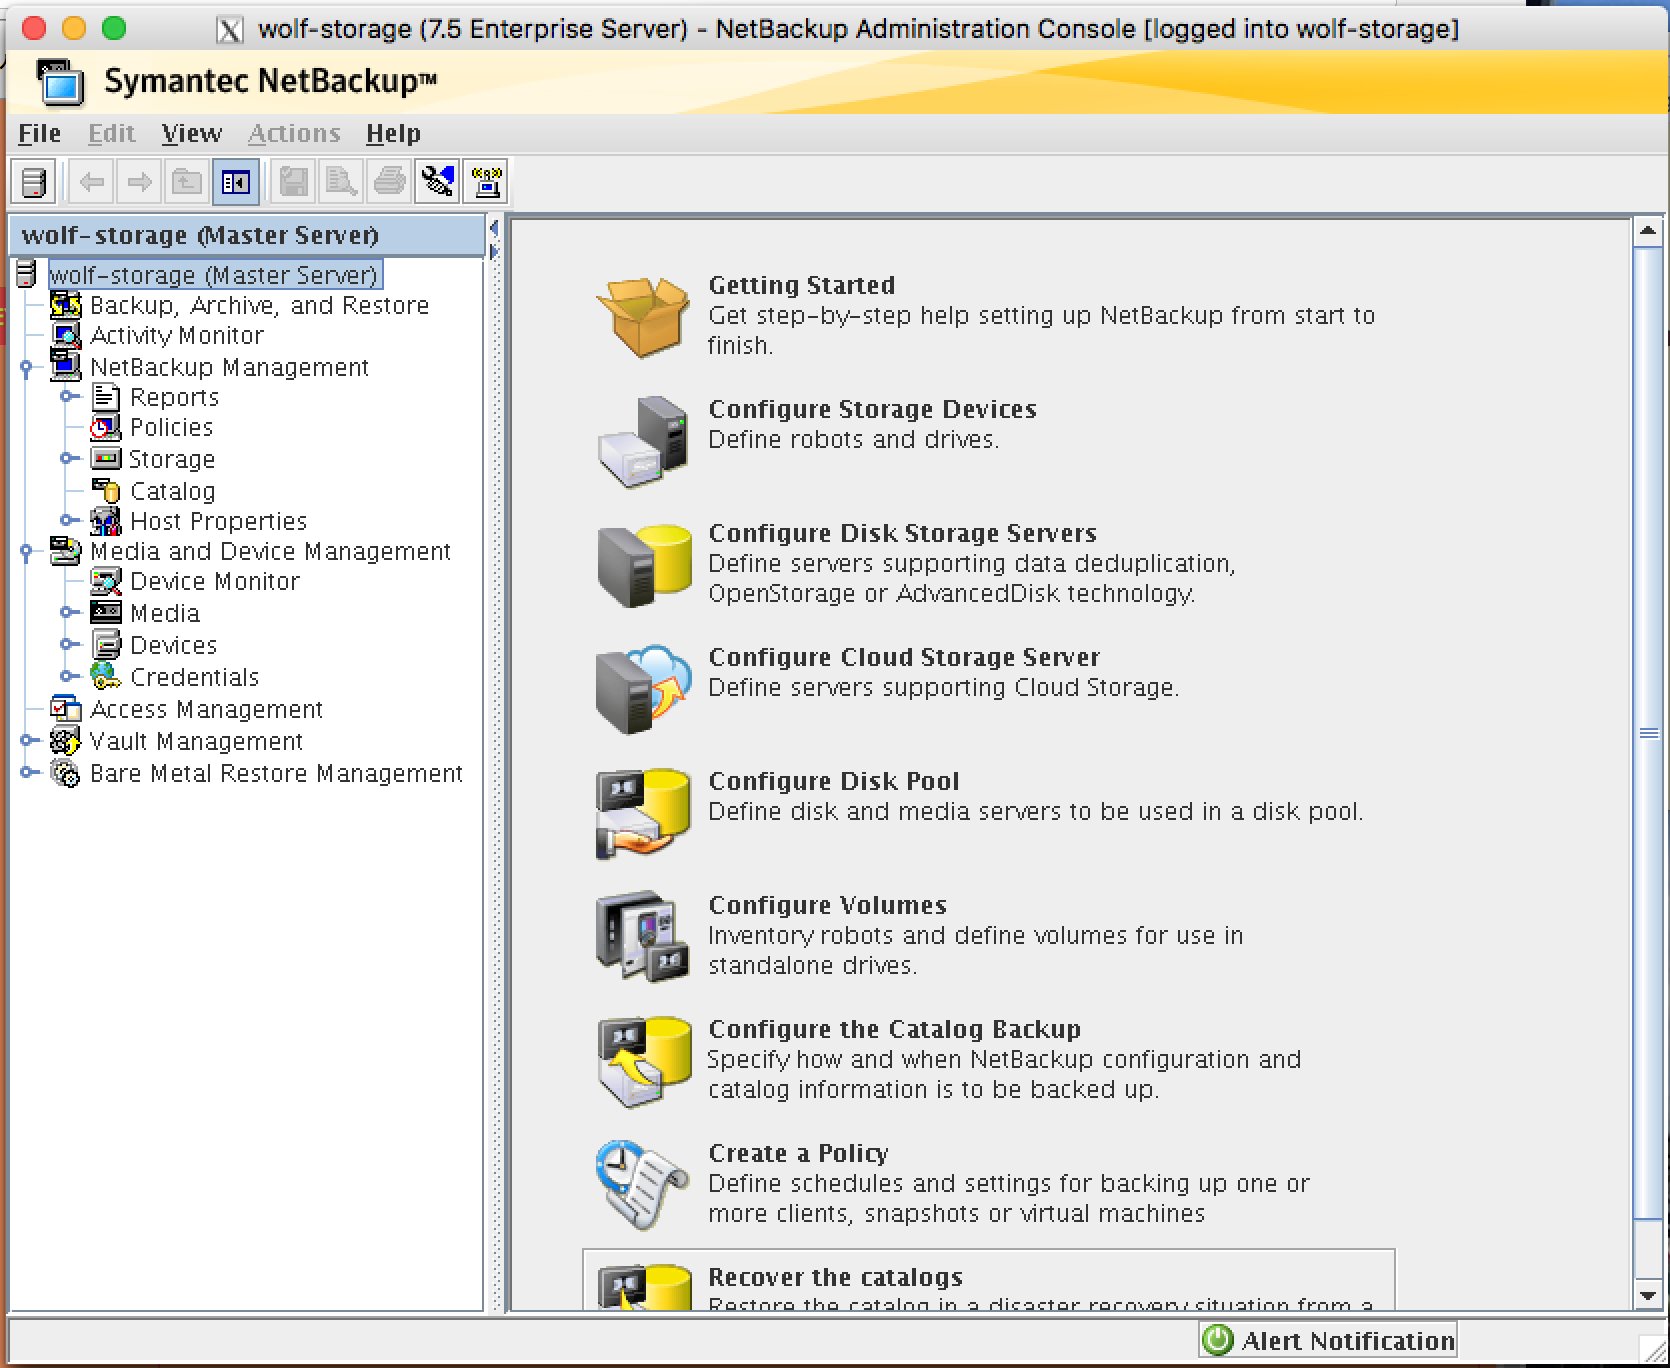
자, 이제 넷백업 설치를 마치고, 백업을 구성할 준비가 끝났다.
—